
Hi everyone!
Hope you guys had a great week– I know I did! This week I primarily focused on researching and learning how MALDI works and the physics behind it. As you can recall, MALDI is a machine that is designed for rapid microbial identification (can pick up small molecules and analyze its components). But I never understood how MALDI was able to do that.
For the past three weeks, I showed you how we made the sample slides so now I will illustrate what happens inside MALDI.
1) When the sample is prepared, it is placed inside a high vacuum environment.
2) A precise laser ionizes the sample, meaning it converts the molecule into ions by removing electrons.
3) When these molecules are converted to ions, a "cloud" of proteins is released and accelerated by an electric charge.
4) Inside the machine is one ring, which is called the ring electrode. The ring electrode is used to record the Time of Flight. It will record when the proteins pass through the ring, which is then calculated using a formula from the time recorded.
5) Then, the proteins are detected by the sensor (as shown in the picture), which creates a spectrum that shows what the protein makeup of each sample (what ions is it composed of).
6) Then the spectrum that is created is compared against a large database of spectra ranging from bacteria to peptides that have been precisely characterized.
To summarize, the sample goes through desorption, ionization, acceleration, separation, and then detection.
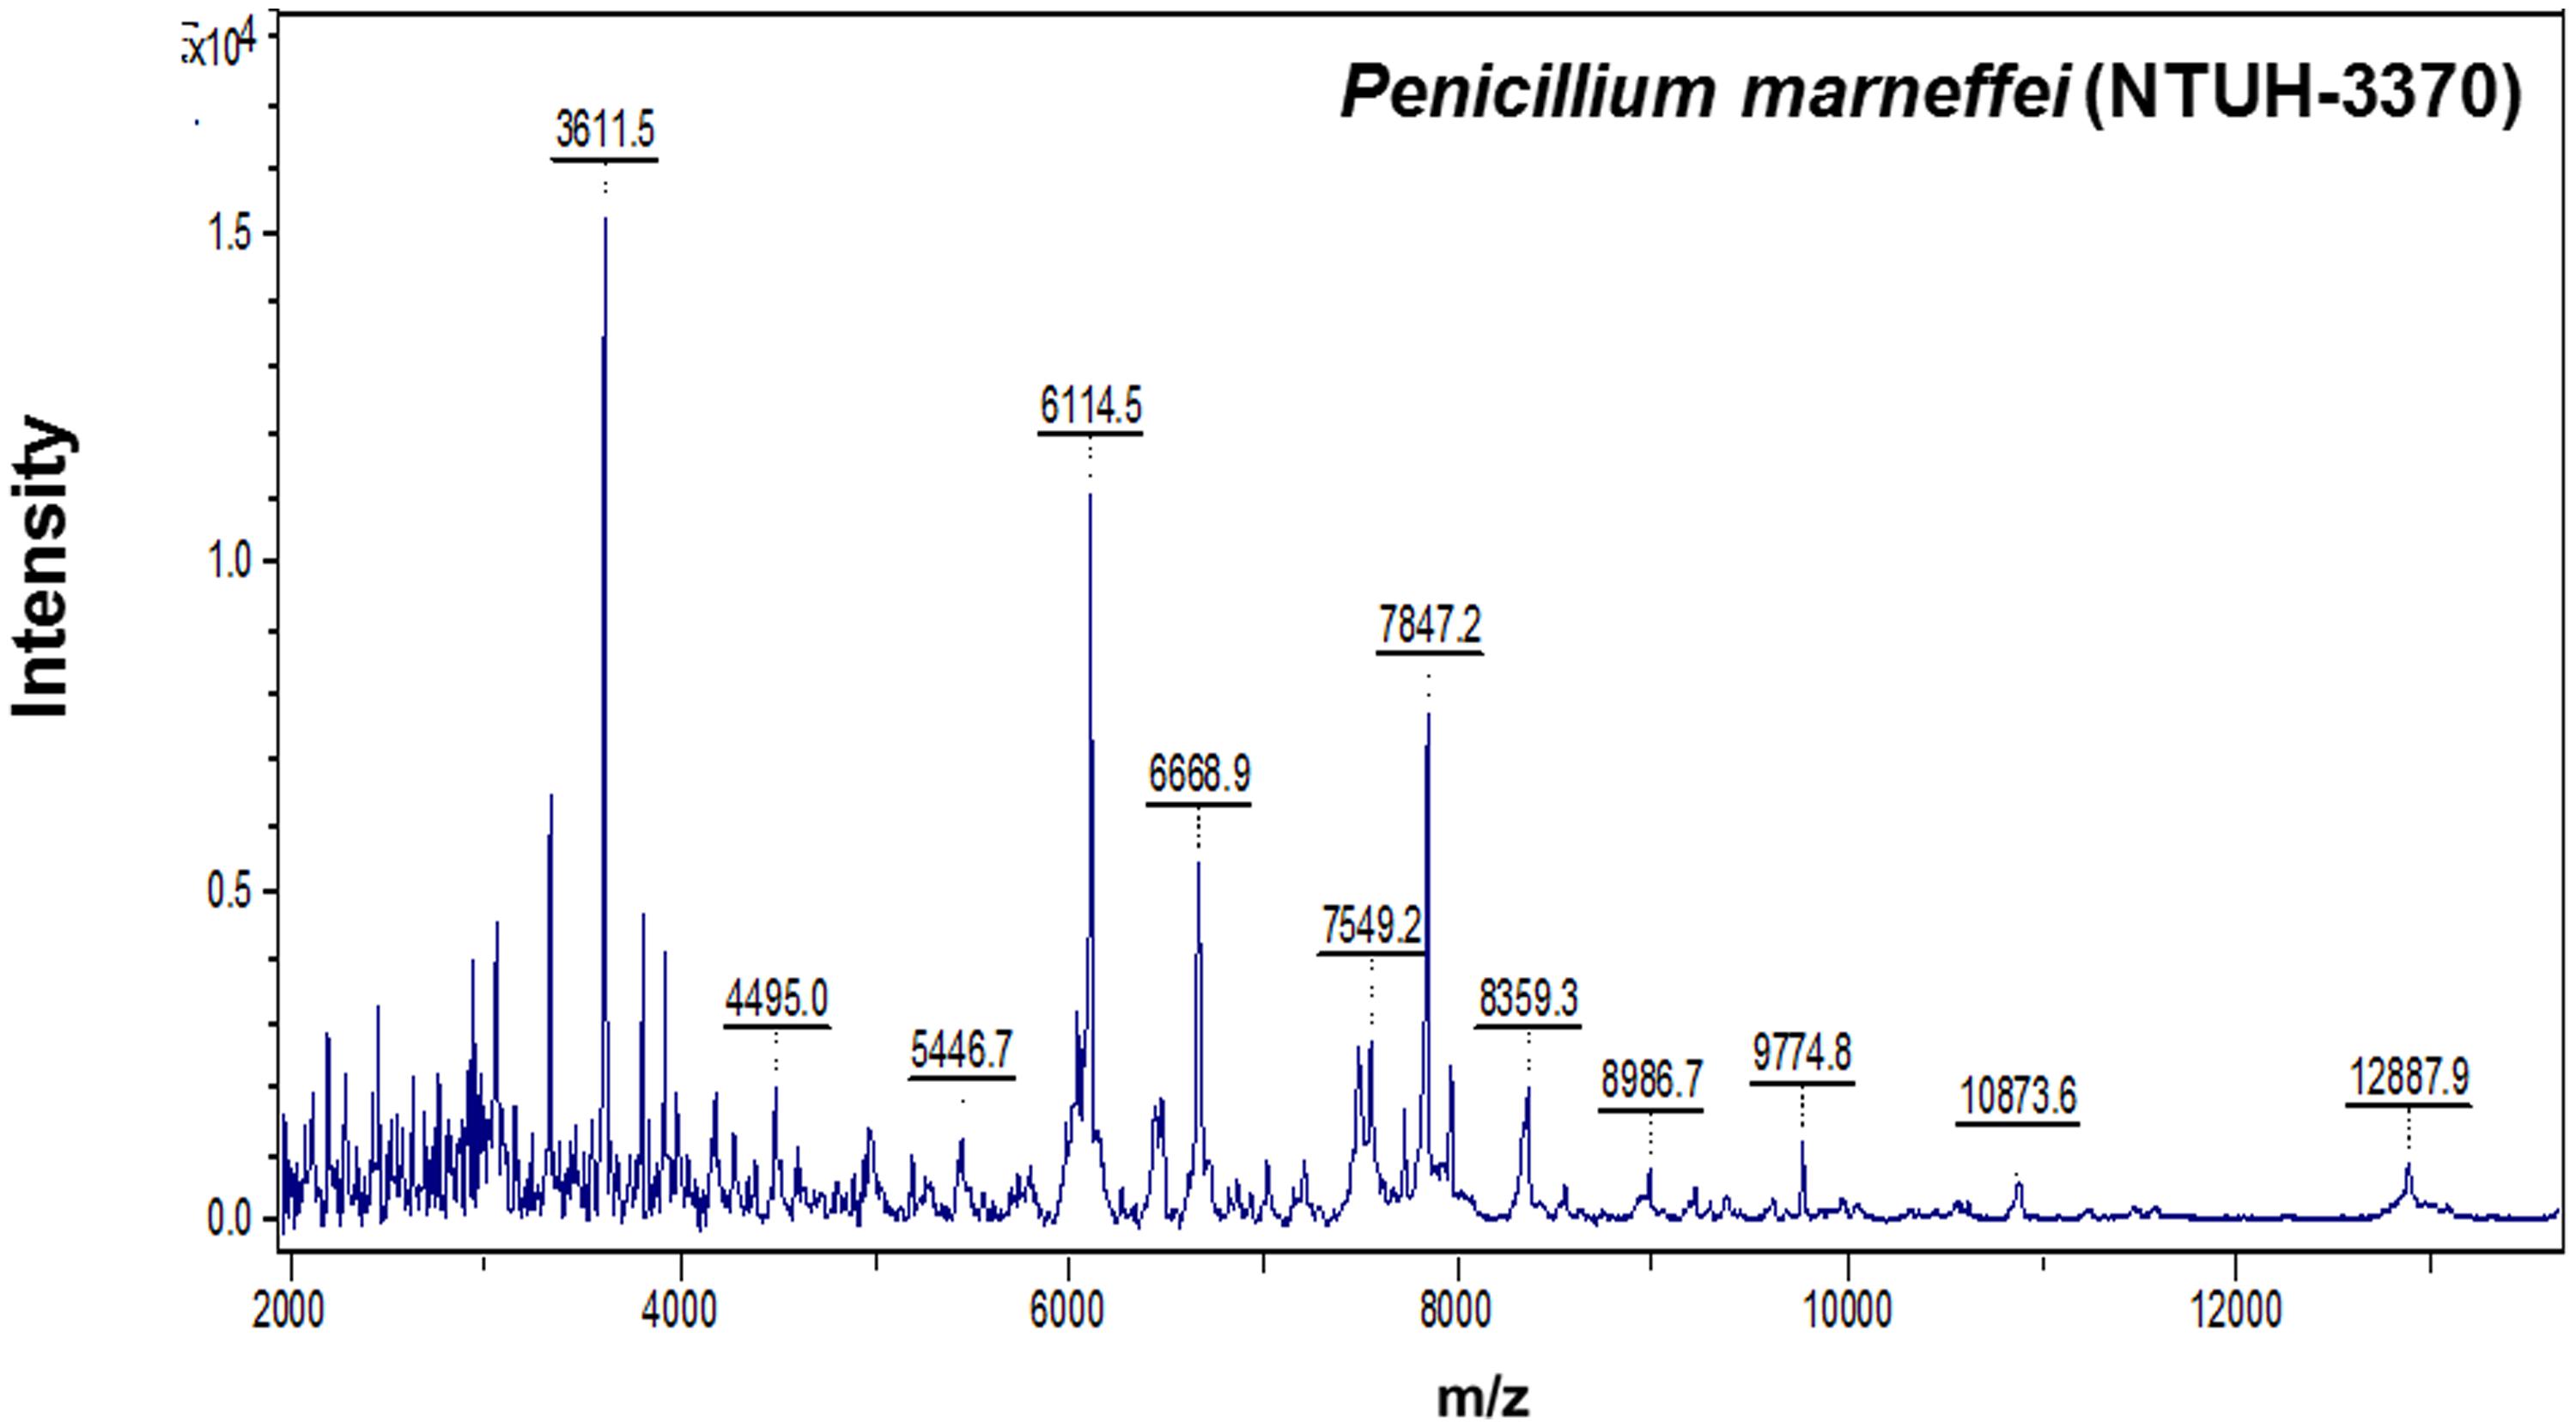
This is what a MALDI spectrum looks like. On the y-axis is the intensity of the peaks and on the x-axis is m/z, which is the mass-to-charge ratio. The M stand for mass and the z stands for charge number of ions. The underlined numbers on the top of the peaks are the values of mass-to-charge for ions observed in the instrument. These peaks correspond to the same molecule, just with different charges.
I know this was a tedious topic for those who don't like physics, but I definitely learned a lot more about the behind the scenes of MALDI. To balance the theoretical portion of this post, I'll show you what I did outside of research. (I kept my promise, I finished the painting before the end of February!)

Anyway, that is it for this week. Hope you liked it!
Seerat Jajj
What a beautiful painting, Seerat - what progress you've made! As a reader, I do appreciate the balance between the technical and aesthetic. Thanks, too, for including the graph!
ReplyDeleteRegarding MALDI, is it possible for samples made out of entirely different materials to have a similar composition/charge? In these cases, does it make the most sense to pursue the cheapest/most economical option? Or are there other secondary factors that are of greater importance?
The painting seriously looks amazing! Thanks so much for having such a clear and easy to read blog!! It is much appreciated.
ReplyDeleteDoes knowing the composition of the sample allow you to know how it will hold up in weather conditions and age?
Wow, this was great detailed explanation of the MALDI. I am curious though, is there an alternate machine that other companies might use instead of the MALDI? Do you know how they compare?
ReplyDelete